Introduction to Java
Java is a High-level, powerful, and evergreen programming language that works on any type of computer and device, which is why it is also called platform-independent programming.
Java was created in 1995 by Sun Microsystems, and now it’s owned by Oracle Corporation. It is widely used in different industries to create desktop applications, web applications, mobile apps, and enterprise systems.
Java has one unique feature, “Write Once, Run Anywhere” (WORA), which means you only need to write your program one time, and it can run on any computer, device or operating system using Java Virtual Machine (JVM). You don’t need to rewrite the code for different operating systems like Windows, Mac, or Linux.
Understand real-life example: Suppose you record one song and play that song on any music player, phone, or speaker with the MP3 format.
Why Learn Java Language?
Java programming is a foundational language in computer science and software development. Here the multiple reasons available:
- Platform-Independent: We can write Java code only once and use it on any programming system without changing it.
- Widely Used: Java is used to make Android apps, large business programs, online systems, and cloud services.
- Beginner-Friendly: Java is written in simple syntax, and it’s also easy to learn programming, especially for new programmers.
- Object-Oriented: Java organizes its code into “classes” and “objects”, so it makes programs easier to build and maintain.
- Job Opportunities: Java is wildly used language and most companies work with Java, so you can easily find jobs.
Basic Java Workflow
Now, we will understand the simple process of Java programming with the following steps:
Write Code: First, we create our program in a file with a .java extension (It means save that file like first.java) in a simple text editor (Notepad) or a special coding tool (IDE) such as IntelliJ IDEA, Eclipse, or NetBeans.
Compile Code: Then it will compile the code using the Java compiler (javac) that changes your human-readable code into a special format, “bytecode”, and saves it in a .class file that computers can understand.
Run Code: Now, the Java Virtual Machine (JVM) reads that bytecode and makes it able to run on your computer, phone, or any device with a JVM installed.
How To Set the Java Development Kit (JDK) on our Computer?
First, we need to install Java on our computer by installing the Java Development Kit (JDK) and setting it properly in the system.
Step 1: Install JDK on Our System
The JDK (Java Development Kit) contains everything that we need to create and run Java programs, like:
- The Java compiler (javac) turns our code into bytecode.
- The Java Runtime Environment (JRE) allows your code to run.
- It also provides extra tools, which are needed for Java development.
How to install JDK?
1) Go to the Oracle JDK download page.
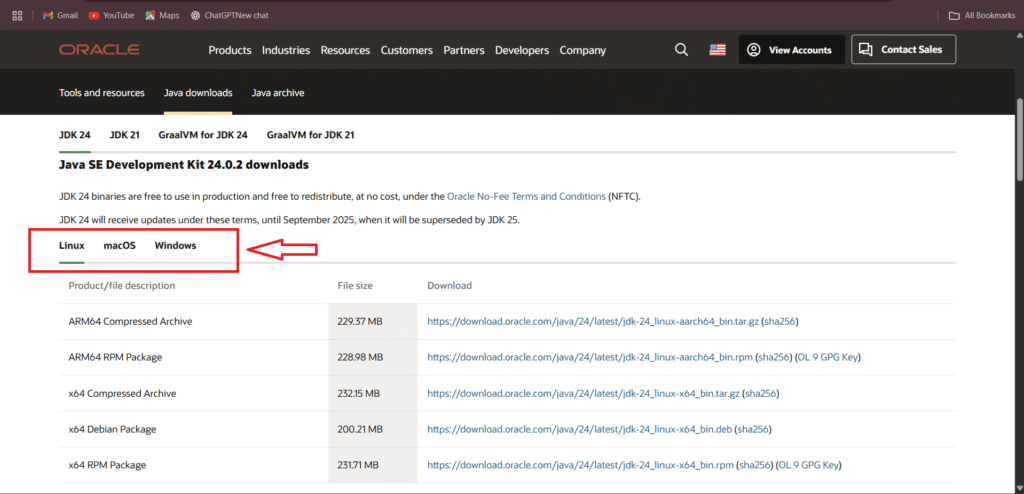
2) Then choose the latest version that matches your operating system (Windows, macOS, Linux). For example, we choose the Windows version:
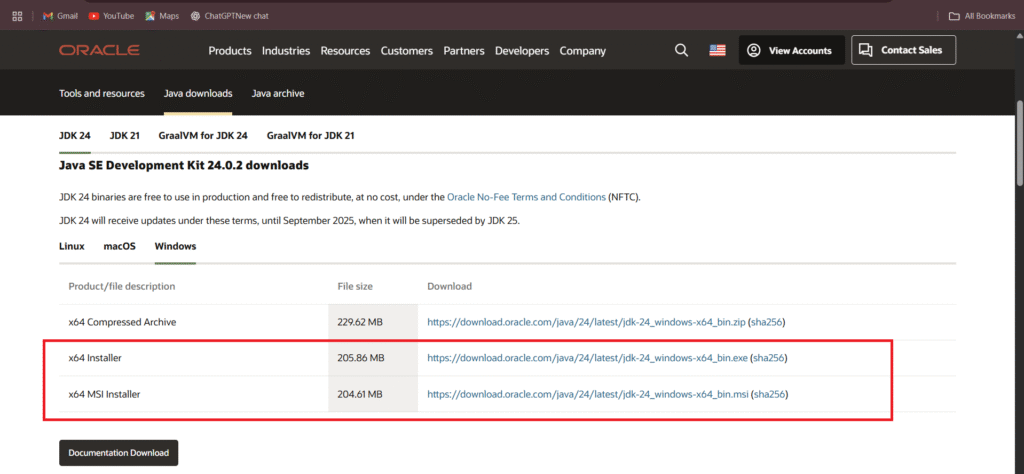
3) Download the installer and run it.


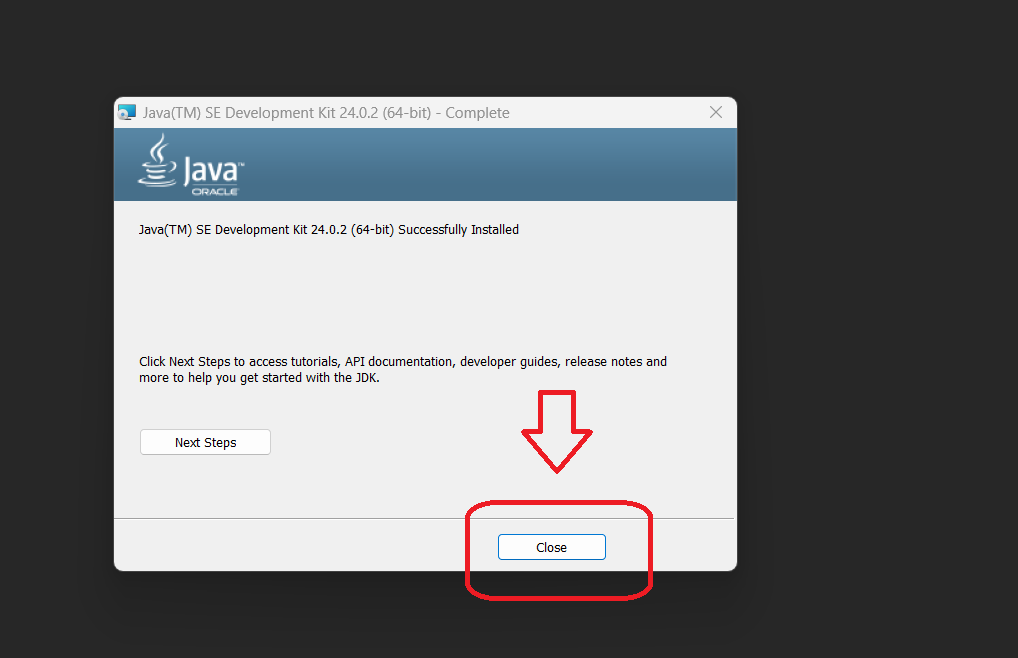
4) Then, follow all the on-screen steps until installation is complete.
Step 2: Set JAVA_HOME Environment Variable
This is the most important part because the JAVA_HOME tells your system where Java is installed. Many programs and development tools need to know the exact location of Java.
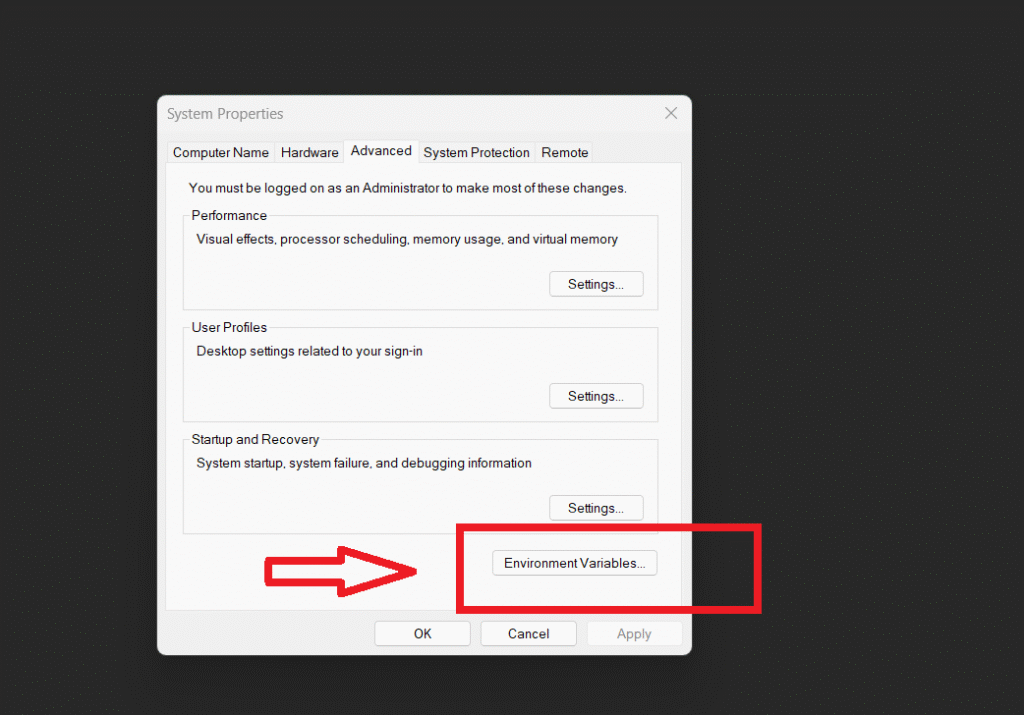
Open Environment Variables on windows by the following terms:
Right-click This PC → click Properties or follow the below step: Select Advanced System Settings.
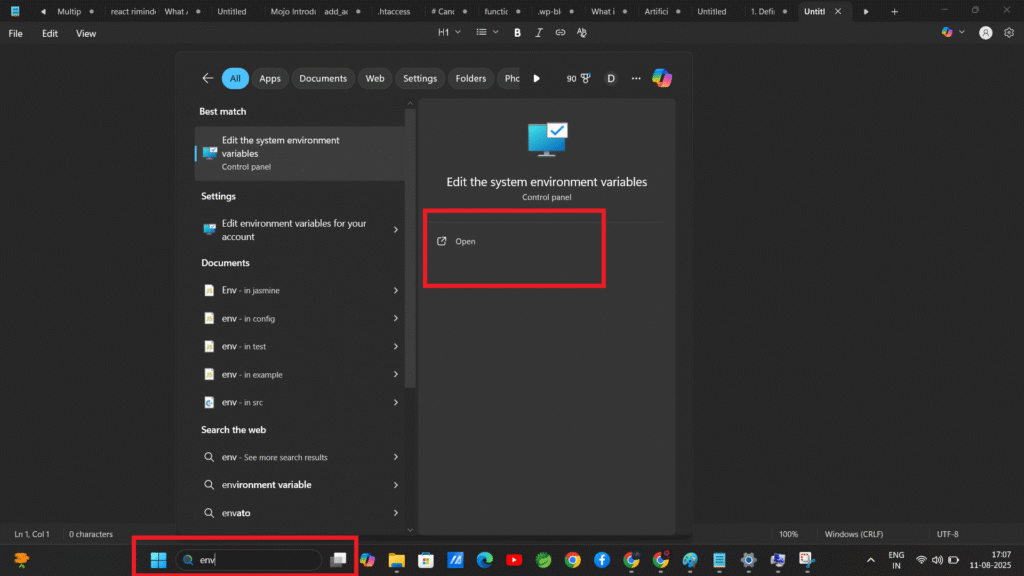
Click Environment Variables.
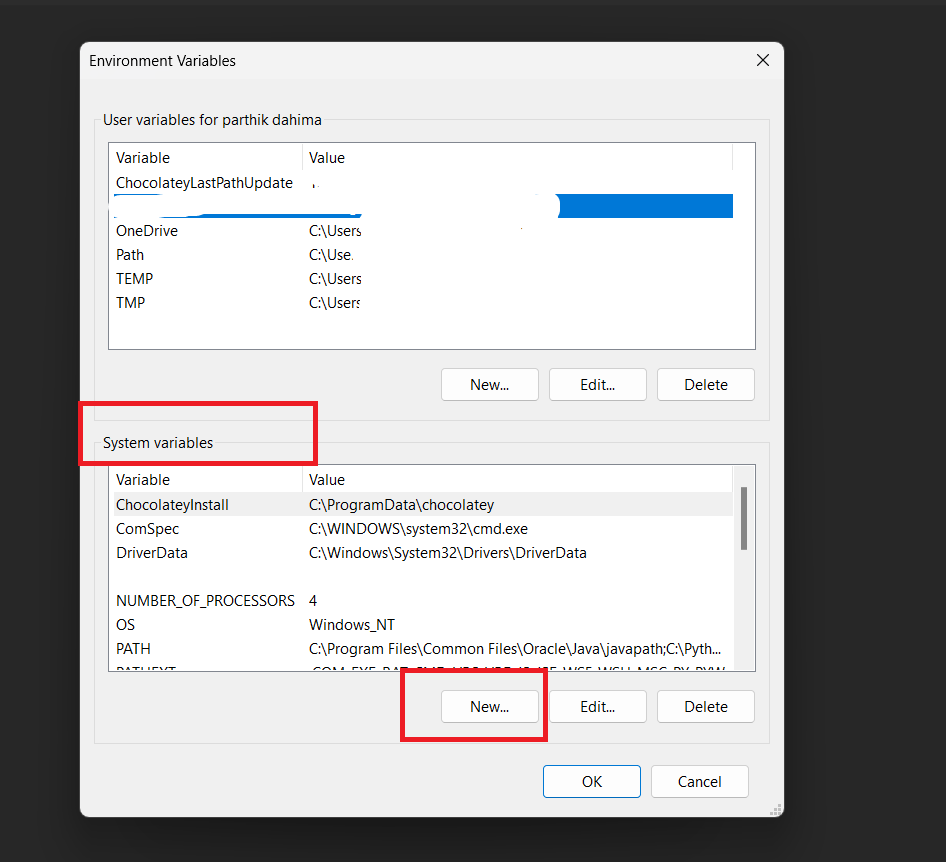
Under System Variables, click New.
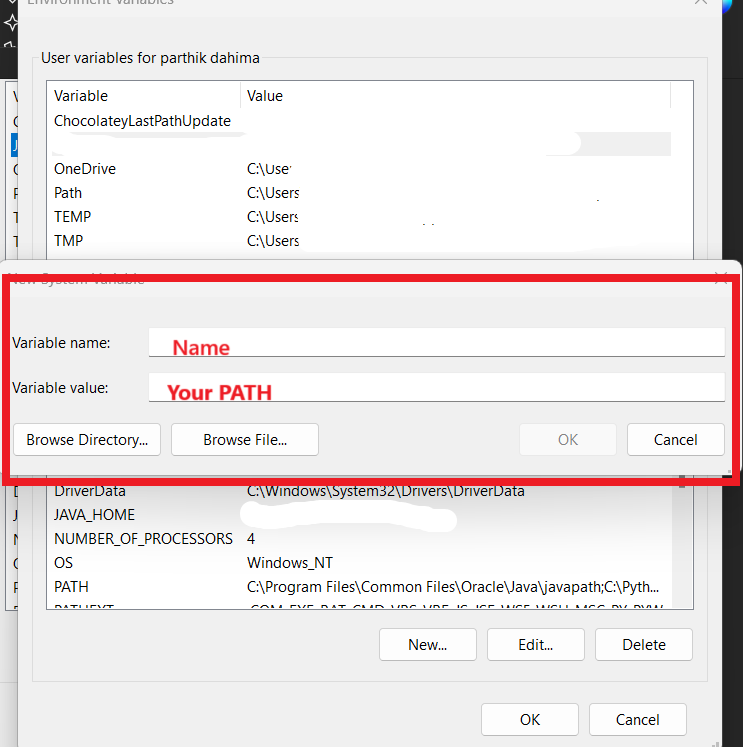
Fill in:
- Variable name: JAVA_HOME
- Variable value: Paste the JDK path (copy this path from your file manager according to the following steps:
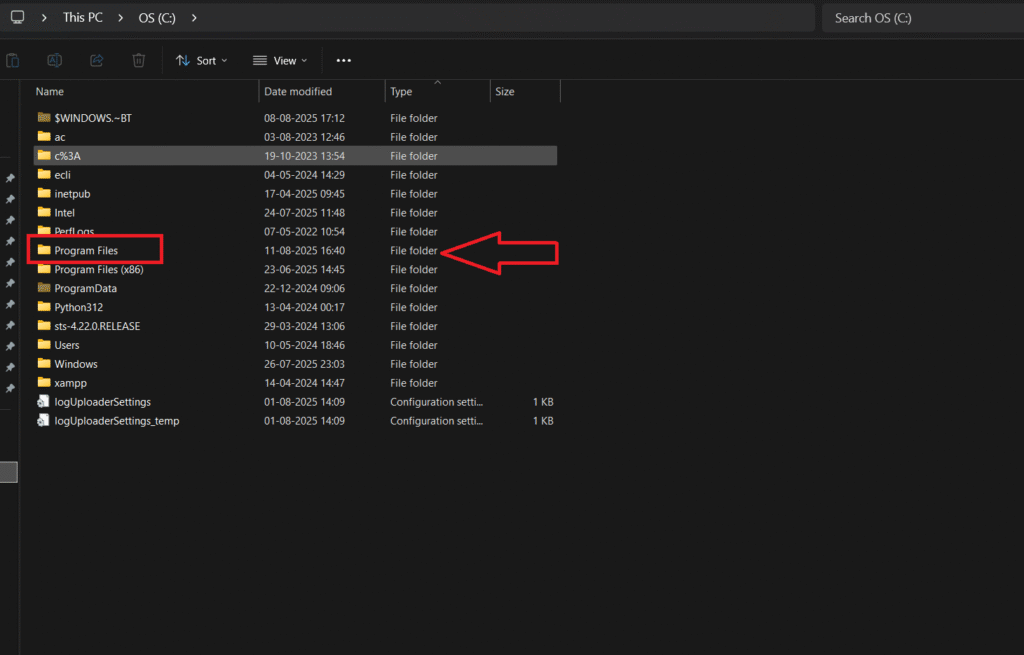
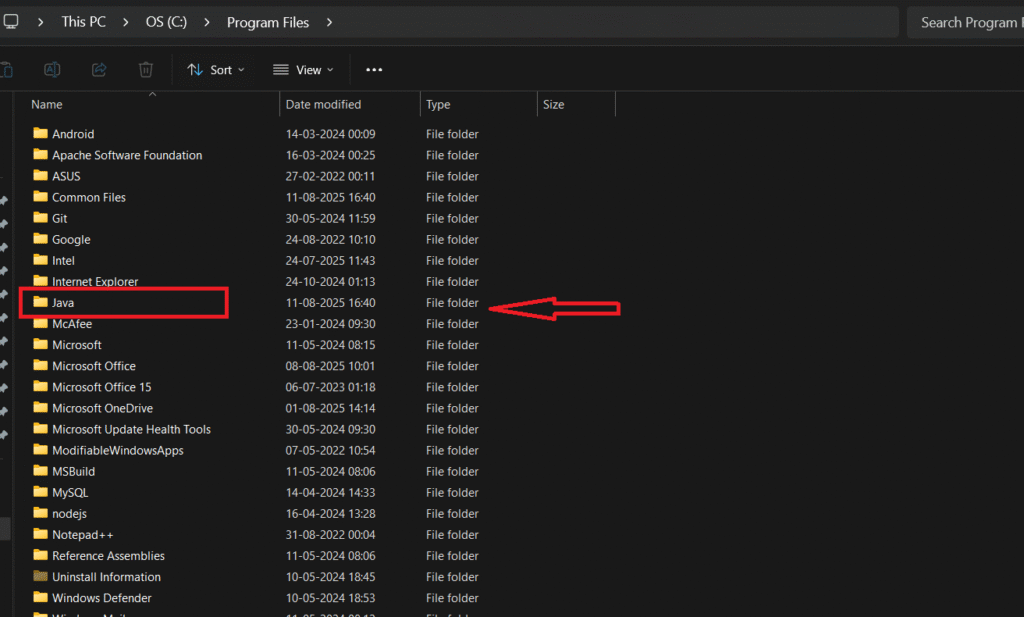
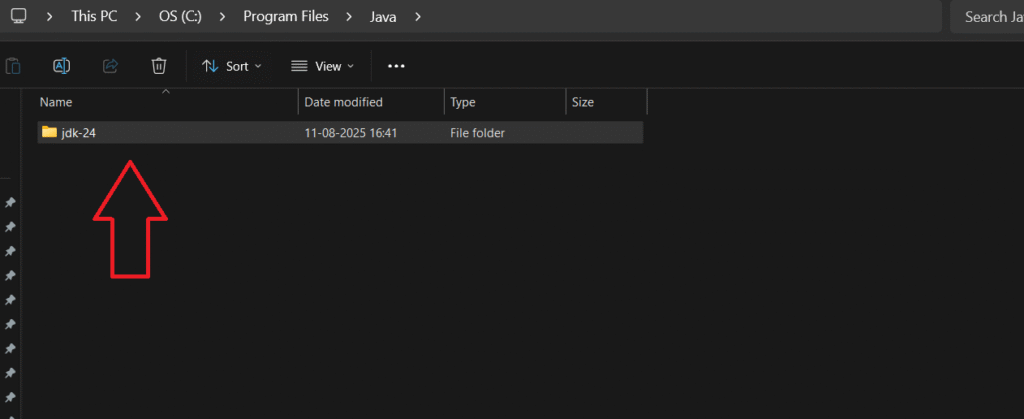
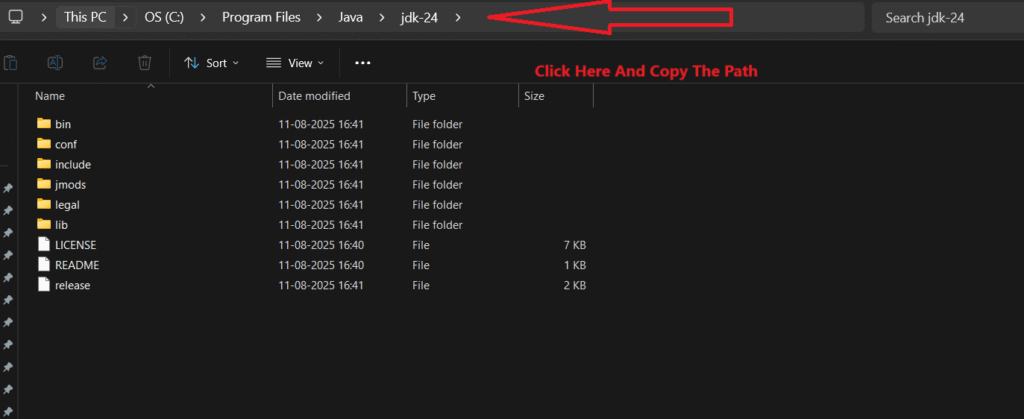
Copy this path and paste it into the System Variables, then save and close.
On macOS/Linux:
- Open the Terminal.
- Find where Java is installed (on Linux it’s often /usr/lib/jvm/…).
- Edit your shell configuration file:
- macOS (zsh): nano ~/.zshrc
- Linux (bash): nano ~/.bashrc
Add:
export JAVA_HOME=/usr/lib/jvm/java-17-openjdk
export PATH=$PATH:$JAVA_HOME/bin
Save the file.
Apply the changes:
source ~/.zshrc   # macOS
source ~/.bashrc  # Linux
Step 3: Verify Java Installation
To make sure everything is set up correctly:
Open Command Prompt (Windows) or Terminal (macOS/Linux).
java -version
javac -version
If the setup was successful, you’ll see something like:
java version "17.0.2"
javac 17.0.2
Your First Java Program
Here’s an example of a simple program in Java:
Code Example:
public class HelloLearners {
    public static void main(String[] args) {
        System.out.println("Hello, learners!"); // Prints Hello, learners! to the console
    }
}
This code will print Hello, Learners to the console.
Explanations of this code:
public class HelloLearners:
- This creates a class (a container for code) named Hellolearners.
- In Java, every program must be inside a class.
- The name of the file must match the class name (HelloWorld.java).
public static void main(String[] args): The entry point of the program.
- This is the main method, the starting point of any Java program.
- When you run the program, Java looks for this exact method to begin execution.
- String[] args allows the program to accept inputs from the command line.
System.out.println(“Hello, Learners!”);
- This prints text to the screen.
- “Hello, learners!” is the text we want to display.
Steps to Run the Program:
1) Save the code in a file named HelloLearners.java (same as the class name).
2) Open the terminal/command prompt and navigate to the folder where your file is saved.
3) Compile the file:
javac Hellolearners.java
- This uses the Java compiler to convert your code into bytecode (a .class file) that the JVM can run.
4) Run the program:
java HelloLearners
- This tells the Java Virtual Machine (JVM) to run the bytecode.
5) Output:
Hello, Learners!
- This is the final printed message to your code.
Components of Java Development
JDK (Java Development Kit): JDK is the compile toolkit for Java developers, and it has everything that you need to write, compile, and run Java programs.
JVM (Java Virtual Machine): This is the engine that runs Java bytecode on your computer. JVM makes the Java platform-independent because it understands bytecode. Each operating system (Windows, macOS, Linux) has its own JVM implementation, but all run the same bytecode.
JRE (Java Runtime Environment): This is everything you need to run Java programs (but not to write/compile them). It included JVM and Java class libraries (pre-written code that Java programs need). If you only want to run Java applications and not build them, you just need the JRE.
Advantages of Java Language
1) Cross-Platform: Means you can write a Java program on one computer and run it on any operating system (Windows, macOS, Linux) without changing the code.
2) Secure: Java runs programs in a controlled environment to prevent harmful actions, and Uses bytecode verification to check if the program is safe before running it.
3) Robust: Java has built-in ways to handle errors (exceptions) so the program doesn’t crash easily. It also manages memory automatically using Garbage Collection (removes unused data from memory).
4) Rich API: API means Application Programming Interface, basically, pre-made code you can use so you don’t have to start from scratch. Java’s API covers everything from networking to file handling to GUI design.
5) Multi-Threading: Java allows you to run multiple parts of a program at the same time for better performance.